Understanding the Interface
Navigate the map, panels, and tools
Understanding the Interface
Grand Tour is designed around a 3D globe map that lets you visualize your journey at a glance. This guide will help you navigate the interface and find what you need.
The 3D Globe Map
The centerpiece of Grand Tour is the interactive map, powered by Mapbox GL JS. It displays your routes, waypoints, and reference data on a beautiful 3D globe.
Navigation Controls
- Pan: Click and drag to move around the map
- Zoom: Use your scroll wheel or pinch on mobile to zoom in and out
- Rotate: Hold Ctrl (or Cmd on Mac) and drag to rotate and tilt the globe
- Reset: Click the compass icon to return to north-up view
The map shows different layers depending on what you’re viewing:
- Routes: Your planned driving routes as colored lines
- Waypoints: Markers for stops along your route
- POIs: Points of interest from the global dataset
- Risk Regions: Areas to avoid, shown as shaded overlays
- Scenic Routes: Recommended drives highlighted on the map
The Navbar
At the top of every page, you’ll find:
- Logo: Click to return to the home page
- Tour Title: Shows the current tour you’re viewing (if applicable)
- User Menu: Access your profile, settings, and sign out
The navbar stays visible as you navigate, making it easy to switch between tours or access your account.
Tour Overview Page
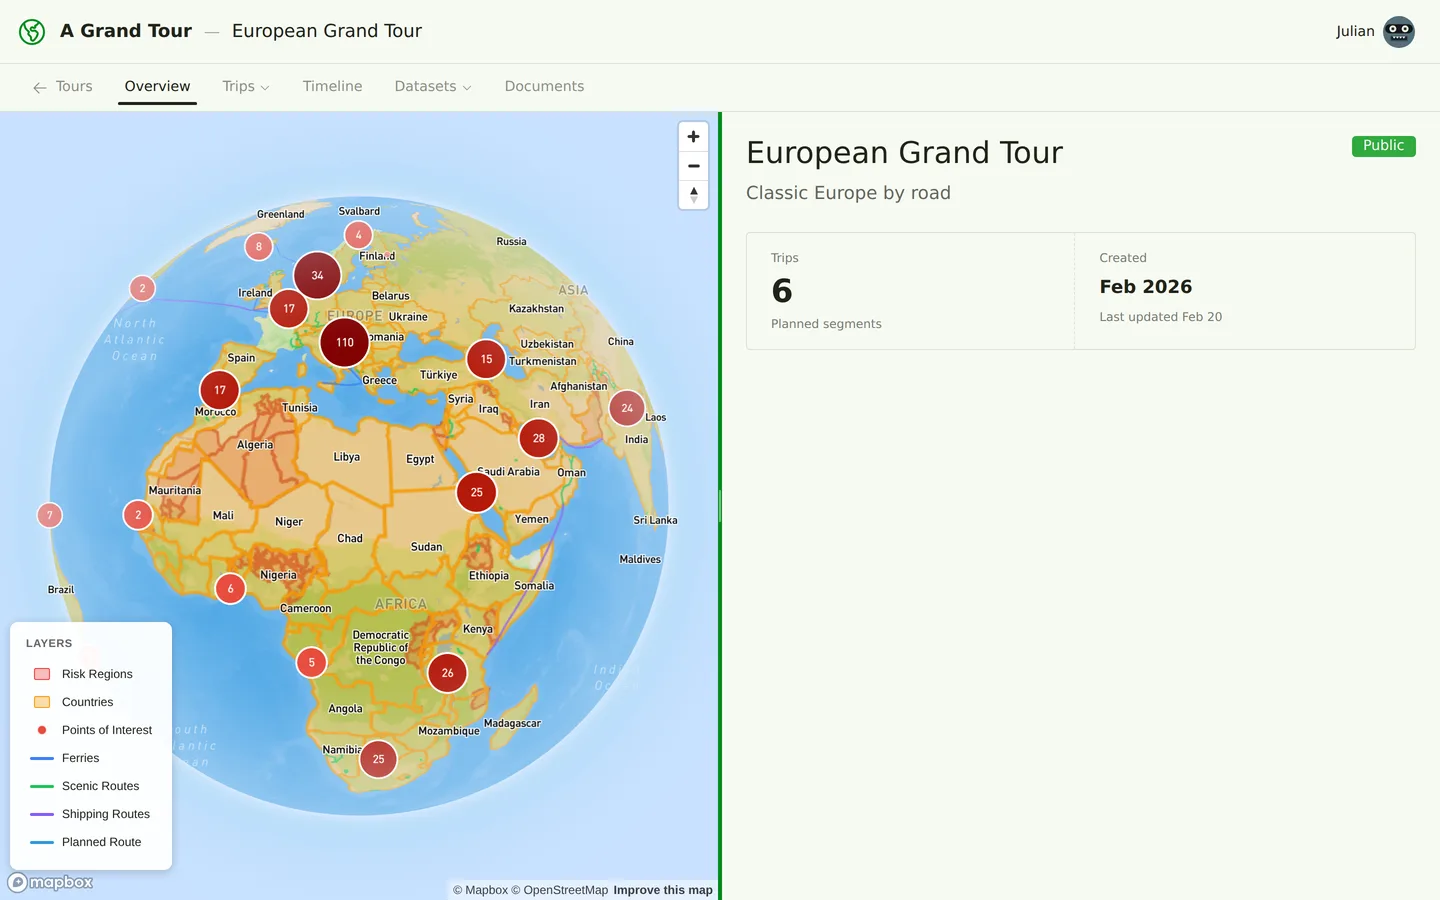
When you open a tour, you’ll see the overview page, which includes:
Globe with All Routes
The map displays all trips in the tour with their routes overlaid. Each trip can have a different color, making it easy to see the big picture of your journey.
Trip List
Below the map, you’ll find a list of all trips in the tour, showing:
- Trip name and subtitle
- Start and end dates
- Current status (Planning, Active, Completed)
- Quick actions to view or edit
Click any trip to drill down into the trip detail view.
Datasets Panel
Access global reference data to enhance your planning:
- Points of Interest: Museums, national parks, landmarks, and more
- Countries: Visa requirements, safety ratings, and practical info
- Scenic Routes: Recommended drives and famous roads
- Ferries: Major ferry crossings and shipping routes
- Risk Regions: Areas with travel advisories or access restrictions
These datasets appear as layers on the map and can be filtered by category, country, or rating.
Documents
Create and organize your planning documents:
- Tour Overview: Auto-generated summary of your entire tour
- Trip Summaries: Auto-generated itineraries for each trip
- Country Notes: Research and requirements for each country
- Custom Guides: Packing lists, vehicle prep, border crossing tips, etc.
Documents support markdown and smart references, letting you link to specific trips, POIs, or other documents.
Trip Detail View
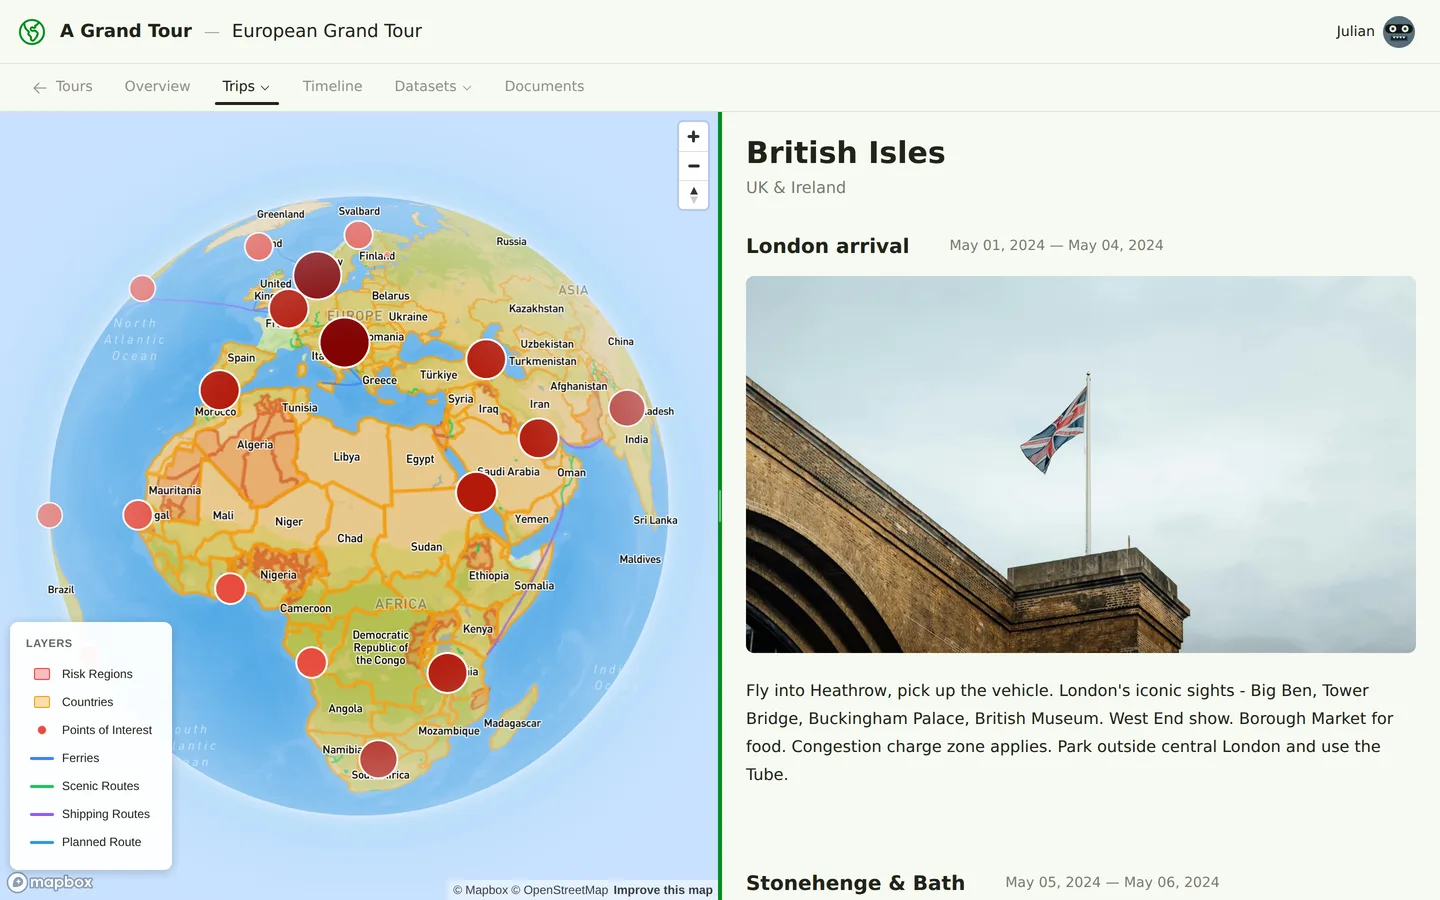
Click into a trip to see:
Route on Map
The map zooms to show just this trip’s route with waypoints and nearby POIs highlighted. Click any itinerary heading to fly the map to that segment, or click a route line on the map to scroll to the corresponding item.
Itinerary Items
Your day-by-day plan appears in the side panel. Each itinerary item can include:
- Date or day number
- Stops: Places you’ll visit that day
- Accommodation: Where you’ll sleep
- Notes: Highlights, warnings, or reminders
- Expenses: Budget tracking for the day
Timeline View
Switch to timeline mode to see your trip as a chronological sequence of events, making it easy to adjust dates and visualize your pace.
Dataset Views
When browsing datasets (POIs, scenic routes, etc.), you’ll see:
- Map Layer: Items displayed on the globe with color-coded markers
- List Panel: Searchable, filterable list of all items
- Detail Panel: Click any item to see full details, images, and ratings
You can add items from the global dataset to your trip or customize them for your specific tour.
Theme Toggle
Grand Tour supports three display themes:
- Light: Clean, bright interface for daytime use
- Dark: Easy on the eyes for evening planning sessions
- System: Automatically matches your device’s theme preference
Change themes anytime from the user menu in the navbar.
Responsive Design
The interface adapts to your screen size:
- Desktop: Full map with side panels for details
- Tablet: Collapsible panels that overlay the map
- Mobile: Swipeable views that prioritize the map or content
All core features work on any device, so you can plan at your desk and review on your phone.
What’s Next?
Now that you’re familiar with the interface, you’re ready to start planning in detail:
- Learn about Routes and Waypoints
- Explore Itinerary Planning
- Discover Reference Datasets
Happy planning!